
How to Replace the Intake Manifold Gasket on Holden L36 & L67 3.8L V6 Engines (Step-by-Step Guide)
Share
How to Replace the Intake Manifold Gasket on Holden L36 & L67 3.8L V6 Engines (Step-by-Step Guide)
If you're running a Holden Commodore VS–VY with either the Ecotec L36 or the Supercharged L67 engine, there's one common failure point you'll eventually face — the lower intake manifold (LIM) gasket. Factory plastic gaskets are known to leak coolant or oil, especially under heat and age. Here's your full guide to replacing the LIM gasket on both engine types.
🔧 Tools & Supplies You’ll Need
- Socket & spanner set (8mm, 10mm, 13mm, 15mm)
- Torque wrench (critical)
- Fuel line disconnect tool (for L67)
- Plastic scraper, rags, and brake cleaner
- Coolant drain pan + fresh coolant
- RTV sealant (Ultra Grey or equivalent)
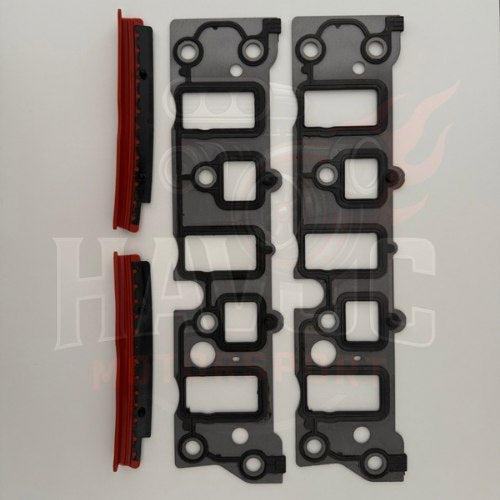
- Steel intake manifold gasket kit
- Optional: rocker cover gaskets, thermostat, injector o-rings
⚙️ L36 Ecotec Gasket Replacement Steps
- Disconnect the battery.
- Remove the airbox, piping, MAF sensor, and intake pipe to the plenum.
- Remove the throttle bracket (3 bolts at rear), and pry off the throttle and cruise control cables.
- If VT–VY, unbolt the EGR. (VS models do not have EGR.)
- Remove the engine belt, then unbolt the alternator and support bracket. Don’t forget the ground wire and plug at the rear.
- Drain coolant by removing the bottom radiator hose. Remove the top hose and thermostat housing. Clean gasket remains. Remove thermostat if replacing.
- Unplug all injectors. Disconnect fuel lines using fuel line tool. Undo vacuum lines at rear of plenum.
- Remove the tensioner pulley assembly. Disconnect heater hoses and slide out the metal pipe.
- Check around the engine bay for loose wires or bolts.
- Remove the 12 LIM bolts. Be ready for coolant spillage.
- Lift off the plenum and lower manifold carefully. Cover ports to prevent debris entry.
- Clean mating surfaces on heads and manifold. Use a razor and turps or brake cleaner.
- Place new LIM gaskets. Apply RTV sealant to all four coolant port corners.
- Torque the LIM bolts to 12–16 Nm (in criss-cross sequence). Let the gasket set for 1–2 hours.
- Reassemble all parts in reverse order. Fit a cooler thermostat if desired.
- Refill with coolant (33–50% mix). Reconnect battery and test for leaks.
- After 1 week, replace coolant and oil to flush any debris.
⚙️ L67 Supercharged Gasket Replacement Steps
- Disconnect the battery and relieve fuel pressure.
- Remove turtle shell cover (4 x 10mm captive nuts).
- Remove alternator (2 bolts, support bracket, rear plug and green earth nut).
- Remove both belts (take photos for reassembly).
- Disconnect lower radiator hose. Drain coolant.
- Remove supercharger idler pulley.
- Disconnect heater hoses at heater tap.
- Remove front heater pipe (1 nut, 1 bolt) and pry it from engine with tyre levers if needed.
- Remove accessory idler bolts and tensioner pulley mount (also pried if needed).
- Unplug coil pack leads (2, 4, 6), label for reassembly.
- Unbolt and remove DFI module bracket (1 long bolt, 2 short).
- Remove intake pipe and throttle body.
- Disconnect temp sender (under blower elbow).
- Disconnect all vacuum hoses (bypass actuator, vac tree, booster, throttle body, etc.).
- Disconnect fuel lines (have rags ready). Remove injector connectors.
- Unbolt fuel rail (4 x 10mm nuts + 1 bolt). Lift rail with injectors attached.
- Remove blower bolts and lift off supercharger.
- Disconnect and remove thermostat housing elbow hose.
- Remove LIM bolts — including the hidden one under boost actuator and loom bracket at rear.
- Lift out lower intake manifold.
- Clean all mating surfaces. Cover ports to protect from debris. Use plastic scraper and solvent.
- Fit steel gaskets and RTV the four coolant corner joints.
- Torque LIM bolts to 15 Nm (in criss-cross pattern). Allow to cure.
- Reinstall components in reverse. Double-check hoses, clamps, and bolts.
- Refill coolant and bleed air out of system. Run engine and check for leaks.
📐 Torque Specs Summary
- LIM Bolts (Both Engines): 12–16 Nm (L36), 15 Nm (L67)
- Supercharger Bolts: 23–26 Nm
- Rocker Cover Bolts: 8–11 Nm
🛒 Get the Right Gasket the First Time
We offer a premium steel intake manifold gasket kit that suits both L36 and L67 engines — built to handle boost, heat, and Aussie driving conditions.
→ Buy the Steel LIM Gasket Kit Now
✅ Vehicle-Specific Fitment Pages:
Seal it once. Drive it hard. Havoc style.